
Add a notebook in a wiki page
Link to a notebook
The simplest way to link to a Jupyter Notebook which is stored in the Drive of a collab is to use the URL of the Lab link in the navigation menu of that collab. That link opens JupyterLab with its file browser focused on the appropriate Drive folder but it does not open any specific Notebook.
Example: https://wiki.ebrains.eu/bin/view/Collabs/my-collab-name/Lab
Users can determine a direct link that will open the Jupyter Notebook by following these steps:
- Open JupyterLab
- Right-click on the Notebook file in the file browser of JupyterLab and select Copy Shareable Link
- Edit the URL to:
- remove anything before the last https:// (in cases where the URL has more than one)
- replace the /user/username/ by /user-redirect/ (note there is one fewer slash '/')
- you should not have spaces in the URL, they appear as %20 or as a dash '-'
The resulting URL should look like:
https://lab.ebrains.eu/user-redirect/lab/tree/drive/Shared%20with%20groups/my-collab-name/my-notebook-file.ipynb
Embed a notebook viewer in a wiki page
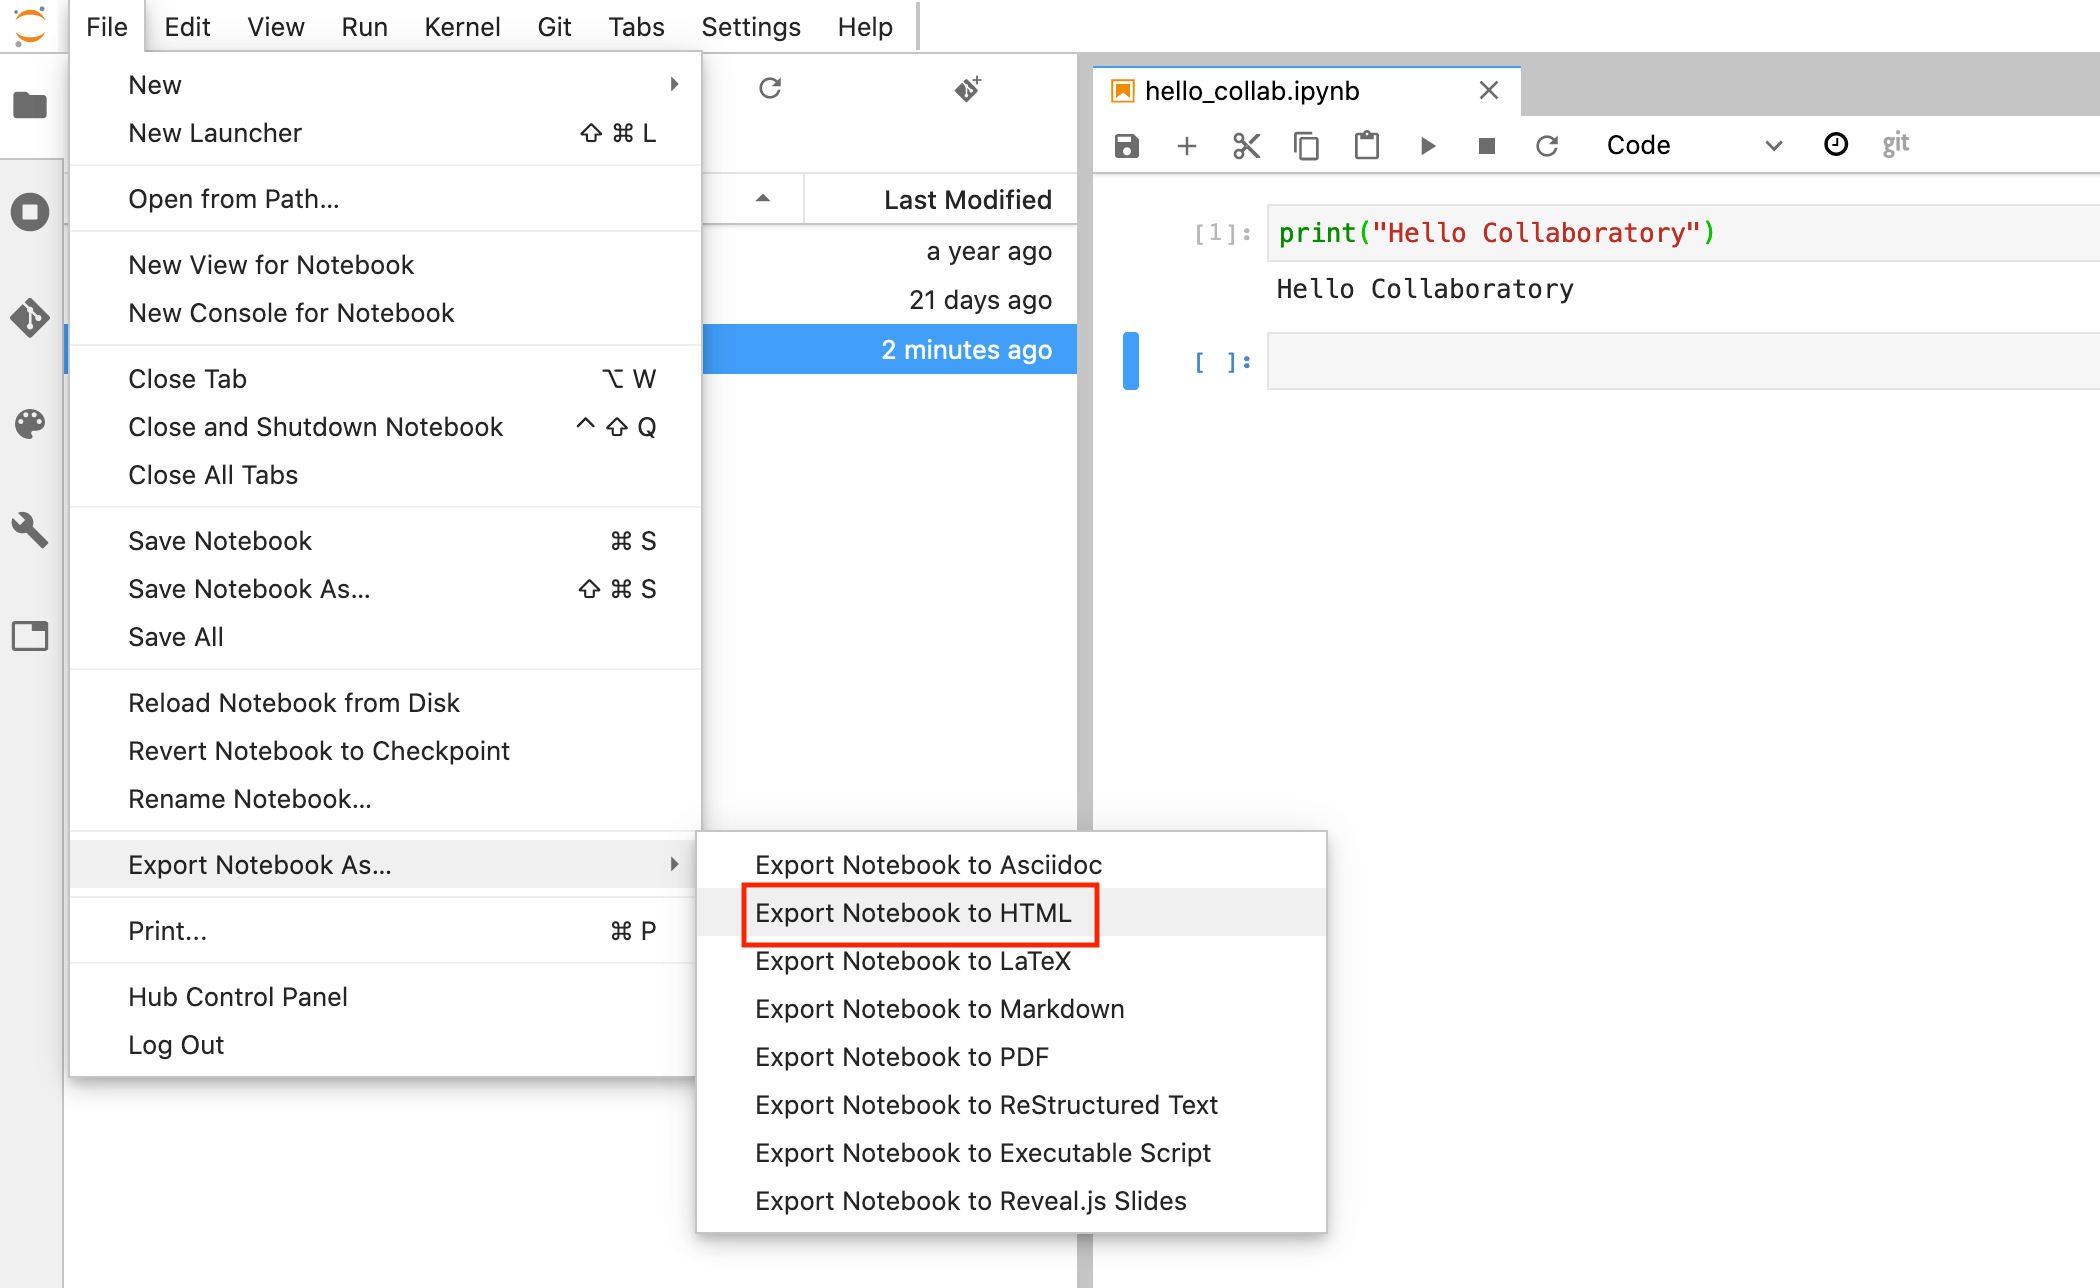
Export a snapshot of a notebook as an HTML file
Go to https://lab.ebrains.eu , choose a notebook, optionally run it, and then export the notebook as HTML.
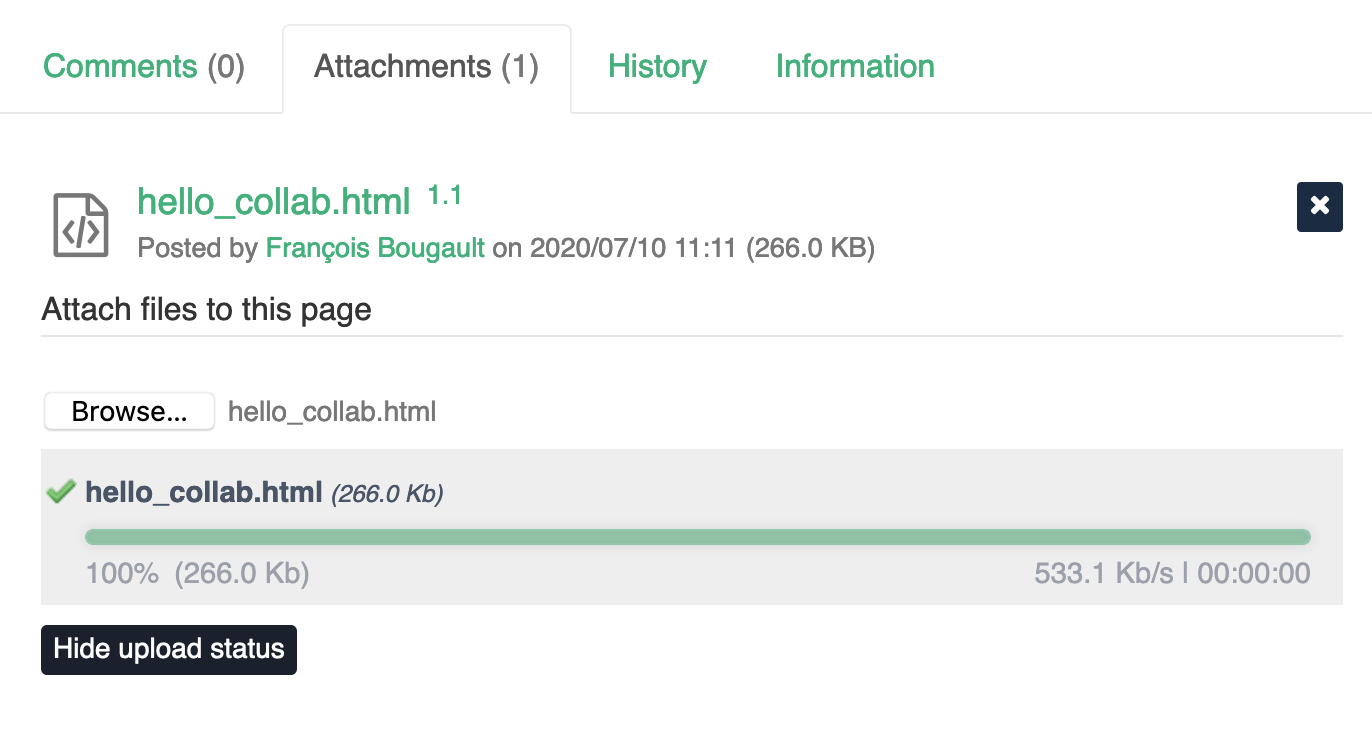
Upload the HTML file as wiki attachment
Go to the wiki page where to embed the notebook viewer. Before editing the wiki page, attach the HTML file generated above in the Attachment section at the bottom of the wiki page. Upload the HTML file. Remember the HTML filename as you will need it for the next step.
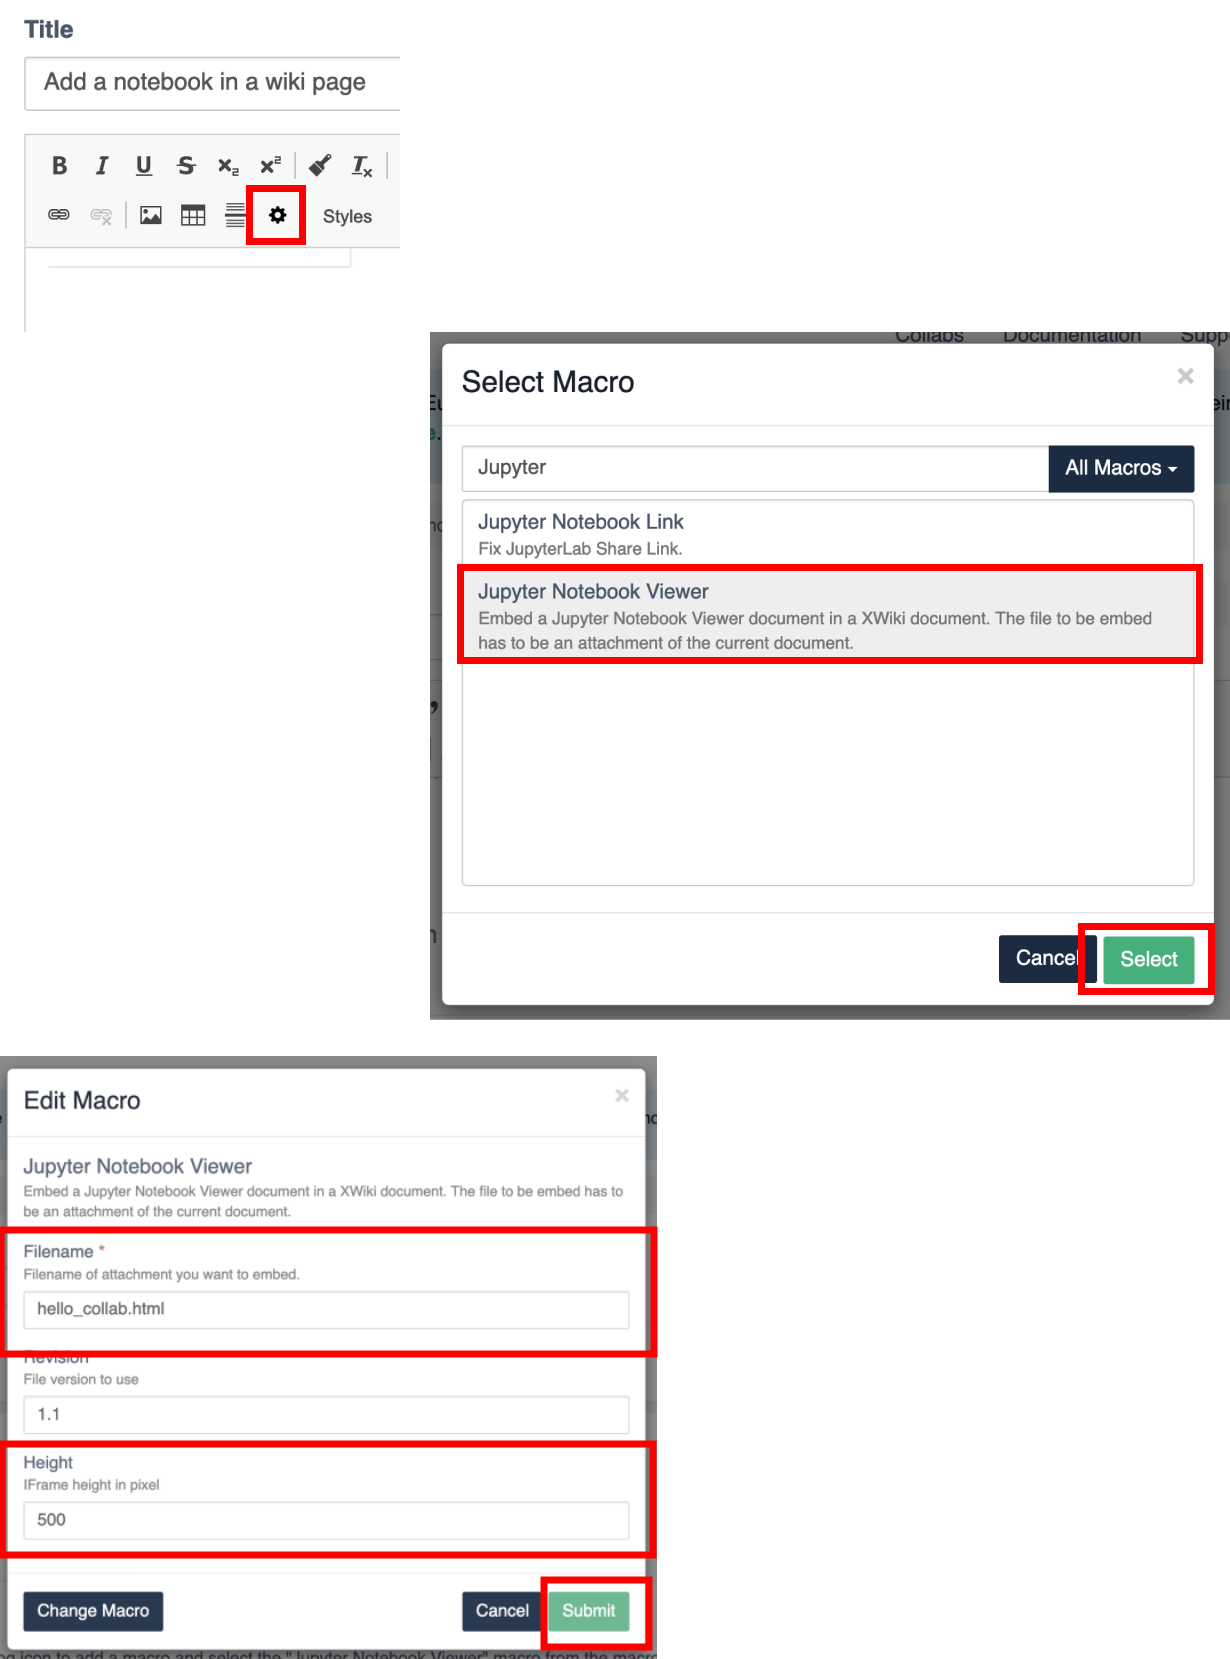
Insert a "Jupyter Notebook Viewer" macro in a wiki page
Edit your wiki page (the one with the HTML attachment). Select a place in the wiki page where to add the notebook viewer. Click the cog icon to add a macro and select the "Jupyter Notebook Viewer" macro from the macro select dialog and click select.
In the "Filename" field, enter the name of the HTML file you have uploaded in the previous step. In our example this is "hello_collab.html". Under revision, enter the revision of the attachment you want to use. In most cases using the default value will be ok. The revision number is the number that appears on the right of the uploaded filename in the attachment section. In our example above, the revision was the default 1.1 (see figure above).
In the "Height" field, specify the container height in pixels. Default is 500. If content overflows the browser displays vertical scrollbar.
Click the submit button.
Save and view the wiki page. You should now see the saved snapshot of your notebook in your wiki page. In our example, it will look something like this.